The original Boler came with a rope and pole awning which required you to stand on your tippy toes to thread the awning into an aluminum track attached to the roof, the material often snags, does not thread evenly or comes out of the track. Installing a bag awning eliminates the need to thread the awning into the track but you still have to fight with poles and guide ropes. The other option I have seen are the large conventional trailer awnings adapted to the Boler, and although these are easy to set-up by the time they are cut to fit the curved sides there is not much awning to sit under.
Shady Boy is a light weight awning originally designed for Volkswagen Vanagon and Eurovan models. but has quickly been adapted to many other vehicles. The 10′ wide by 6′ deep awning is three feet wider than the original Boler awning yet weighs less than 15 pounds, has no moving parts, and neatly fits into a small anodized aluminum case measuring about 4′ long.
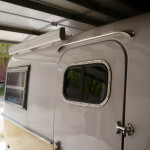
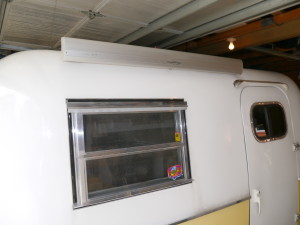
I installed my awning offset towards the rear to maximize the usable space, the awning still fully covers the entry door but extends further back so the doorway is not blocked by chairs.
Lets start by showing how easy the awning is to set-up, then how to mount it on your Boler
Installing the Shady Boy Awning
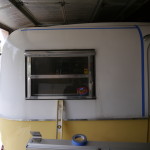
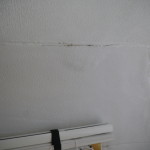
Start by laying out some guide lines using painters masking tape. My initial plan was to offset the awning and use the front edge on the door as the reference, but I lined up the left edge of the awning case with the left edge of the side window. I liked this placement the best for looks, it also provides good coverage of the doorway
Take measurements from the belly band, this is a fixed horizontal line that the eye will always see as being level, any items not mounted parallel to this will look crooked.
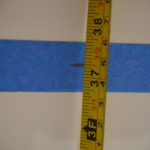
Measure up from the belly band 37 ¼” this measurement can be varied based on your preference, I chose this measurement because the brackets fit the roof curvature correctly, it is high enough to fully clear the door when it is opening and yet low enough to easily set the awning up.
Measure up from the belly band in several places and mark the tape, then with a straight edge draw a line along the tape to join the marks at 37 ¼”
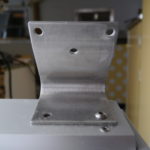
Mount the brackets on the the awning with the supplied bolt, snug the bolt but the bracket should still the able to move so it can align with the roof. The center hole will be used as the reference to line up with the mark on the tape
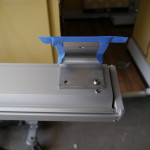
Place tape on the edges of the brackets to prevent scratching your paint or gel coat. The next part I needed both hands so no pictures. Hold the awning up aligning the center reference hole along the line on the masking tape while also aligning the left edge of the awning case with the left edge of the side window and mark the point to drill.
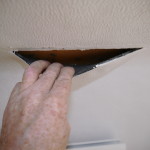
I didn’t want the mounting bolts visible on the inside so I carefully pulled the ensolite away from the fiberglass on the inside, the idea is to have the bolt heads hidden behind the ensolite. Then VERY carefully drill a 1/4″ hole through the fiberglass body through the mark on the tape, usa a sharp drill bit (new) and do not push hard, let the drill do the work. As soon as the drill is through the fiberglass STOP, you don’t want to put a hole through the ensolite.
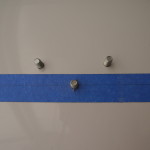
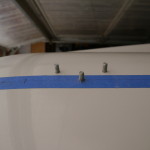
The picture jumps ahead a little so follow these instructions. Insert the single bolt through the one hole you have drill from the inside. With someone helping you place the awning and bracket onto the bolt and hand tighten. Now working on the front awning bracket line up the center reference hole with the line on the masking tape, making sure the brackets are sitting flat and level on the roof surface drill the hole using the hole in the bracket as a guide.
Install the bolt through the front bracket in the same way as the rear and hand tighten. with the awning now in place drill the remaining mounting holes in the front and rear brackets.
1″ fender washers should be used between the bolt and the fibreglass on the inside to distribute the load over a larger area
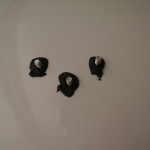
Remove the awning, clean up the tape and surface of the fiberglass. Insert the six bolts through the holes from the inside and apply butyl rubber tape around each hole to prevent leaks.
Aligning the bolts with the brackets place awning into position, install lock washers and nut and tighten each progressively. After tight clean up any butyl that has been squeezed out around the brackets.
The ensolite will return to its original shape, just apply a small amount of adhesive to hold it. Placing the bolts behind the ensolite is my preference, if you don’t want to fuss with the ensolite there is no problem drilling right through, the bolts will just be visible on the inside, but you could easily cover these with plastic bolt caps or paint them white.
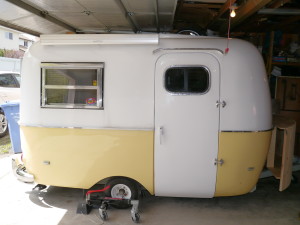
The completed awning installation. I ONLY use the small 8″ tires to park my Boler in the garage, these are NOT used for towing or travel
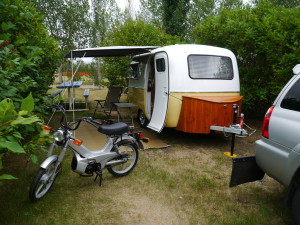
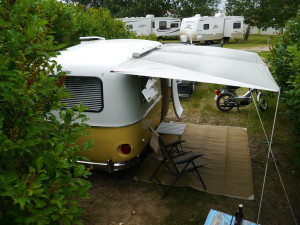
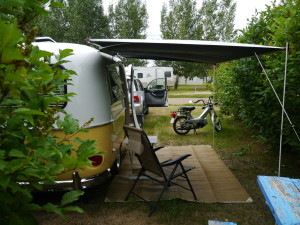
Jason
Hello, I was wondering if you could tell me what size bolts you used to mount the awning?
Thanks!
Ian
I think I used 5/16″ x 3/4″ NF (but that was last year) I used the size of bolt that fits the supplied bracket.
Jason
Ok thank you very much!
sherri
How much is one..
Ian
Please contact Shady Boy directly for the most current price.
I found their prices reasonable and love the awning
Their email is shadyboy@shadyboy.com or call them at +1 (604) 868 0269.
John
Thanks Ian . It worked perfectly .Regards John
Anjanette
Hi Ian,
Thank you so much for your instructions for the ShadyBoy install. I installed one this past weekend on my 13′ Burro.
The install was easy, even with the modifications I made to the install for the double fiberglass wall.
Thanks again
Anjanette
Alison
would love to know more about how you modified for a burro install!
Don Muldoon
Is this Awning still available. Is there a model number that I can order from the Shady Boy company.
Ian
Yes these awnings are available through Shady Boy http://www.shadyboy.com/ contact them directly, they are a great company to deal with
Lisa Cryderman
I m interested in the wheels you used to park the trailer in your garage. the boler is 6’11’
i have a triple e surfside its 7’6′ and a standard garage door is 7′ wonder if this would work for my situation. As im asking this question i am thinking it wont give enough clearance…
thoughts
Ian
The wheels are 4.80×8″ which have a diameter of 16″, if your trailer has 175/80R13 wheels those are 24″ in diameter so the smaller wheels will lower the height of the trailer by 4″. Note: only use these wheels for storage, never use them on the road.